Extension Setup
Get Started
Section titled “Get Started”- Create a new project (e.g. Subscriptions).
- Create a new item, adding the subscription title as the name and entering a recurring date in the date field (see below for accepted inputs).
- Click on the item you have created and add the subscription’s details as the first line in the description in the following format:
[Amount: 20, Currency: USD]. Note, the amount and currency are completely customisable and can be any value, as long as they follow the shown format. - Repeat steps 2 and 3 for all your subscriptions.
Accepted Recurring Due Date Inputs
Section titled “Accepted Recurring Due Date Inputs”Not familiar with “Recurring Due Date Inputs” in Todoist? Check out this Todoist help guide and come back.
The extension currently accepts the following recurring due date intervals for items in the format of <Month[Optional]> <Day[Optional]> every <Interval>, replacing each instance of <> with your custom inputs.
| Your custom interval in Todoist | Extension’s mapping |
|---|---|
| day | Daily |
| 1 | Daily |
| 7 | Weekly |
| week | Weekly |
| 14 | Biweekly |
| two weeks | Biweekly |
| 30 | Monthly |
| 60 | Bimonthly |
| 90 | Quarterly |
| quarter | Quarterly |
| 180 | Semiannually |
| 365 | Annually |
| year | Annually |
Examples
Section titled “Examples”To set a subscription that recurs every month on the 1st, you can write August 1st every month, with ‘August 1st’ being the monthly due date and ‘every month’ being the recurring period. If the next billing date is today, then simply write every month and it will use the current date as the recurring cycle.
The same concept applies for all other recurring periods, changing the word after every to suit. For example, you could have August 1st every year to recur annually or August 1st every 90 days for every quarter.
Using the above examples, creating a new subscription item with the name “Water Bill” could be done by writing the following in the item’s title: Water Bill August 1st every quarter. This then creates a new item with the name “Water Bill” and repeats every quarter starting from August 1st.
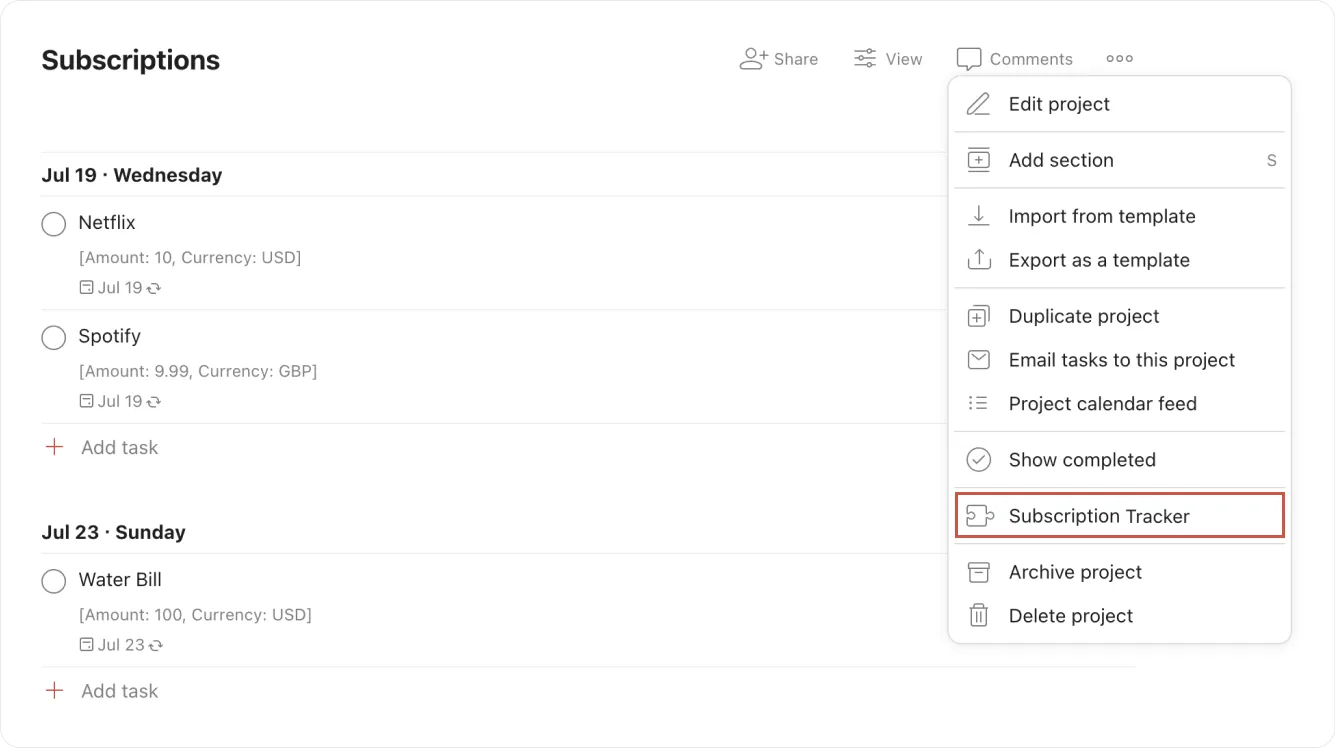
Open the Subscription Tracker extension in your project by clicking the three dots in the top right corner of the project and selecting ‘Subscription Tracker’ from the select menu (as shown below).