Getting Started
Installation
Section titled “Installation”The app can be installed via the monday.com App Marketplace. Simply search for File Publisher.
Walkthrough
Section titled “Walkthrough”Board Setup
Section titled “Board Setup”Depending on the chosen action, the required columns vary. Below is a list of the key columns for each action:
Generate individual links
Section titled “Generate individual links”| Automation | Required Columns |
|---|---|
| Publish files in files column and store public url(s) in public urls | Files column: File, Public urls: Long text |
| Publish files with password protection | Files column: File, Public urls: Long text, Password: Long text or Text |
| Publish files with expiry date | Files column: File, Public urls: Long text, Expiry date: Date |
| Publish files with password and expiry date | Files column: File, Public urls: Long text, Password: Long text or Text, Expiry Date: Date |
Generate grouped links
Section titled “Generate grouped links”| Automation | Required Columns |
|---|---|
| Publish files grouping multiple files into the same url | Files column: File, Public urls: Link |
| Publish grouped files with password | Files column: File, Public urls: Link, Password: Long text or Text |
| Publish grouped files with expiry date | Files column: File, Public urls: Link, Expiry date: Date |
| Publish grouped files with password and expiry date | Files column: File, Public urls: Link, Expiry Date: Date, Password: Long text or Text |
Delete links
Section titled “Delete links”| Automation | Required Columns |
|---|---|
| Delete published urls for files and clear public urls | Files column: File, Public urls: Long text or Link |
Using automation templates
Section titled “Using automation templates”Now that your board structure is ready to go, let’s generate links using a pre-made automation template.
Click on Automate in the top right corner

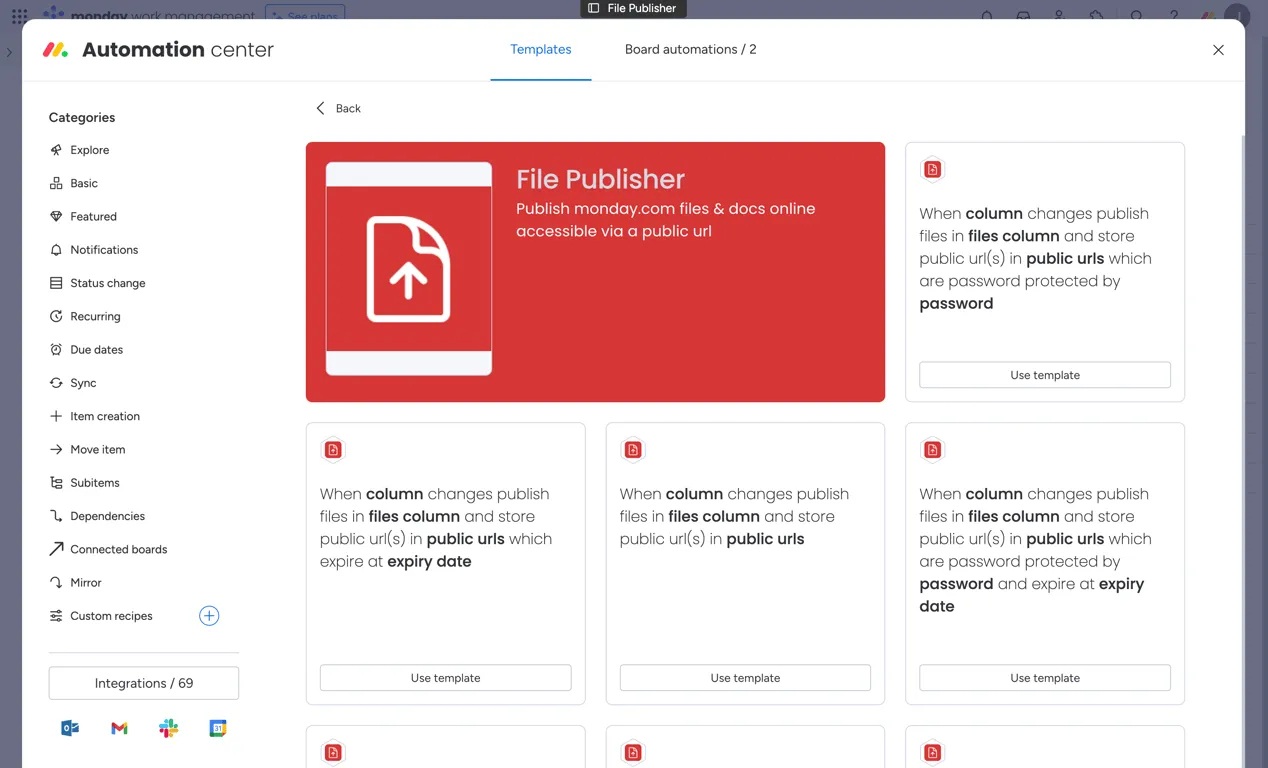
Go to Templates and search for File Publisher
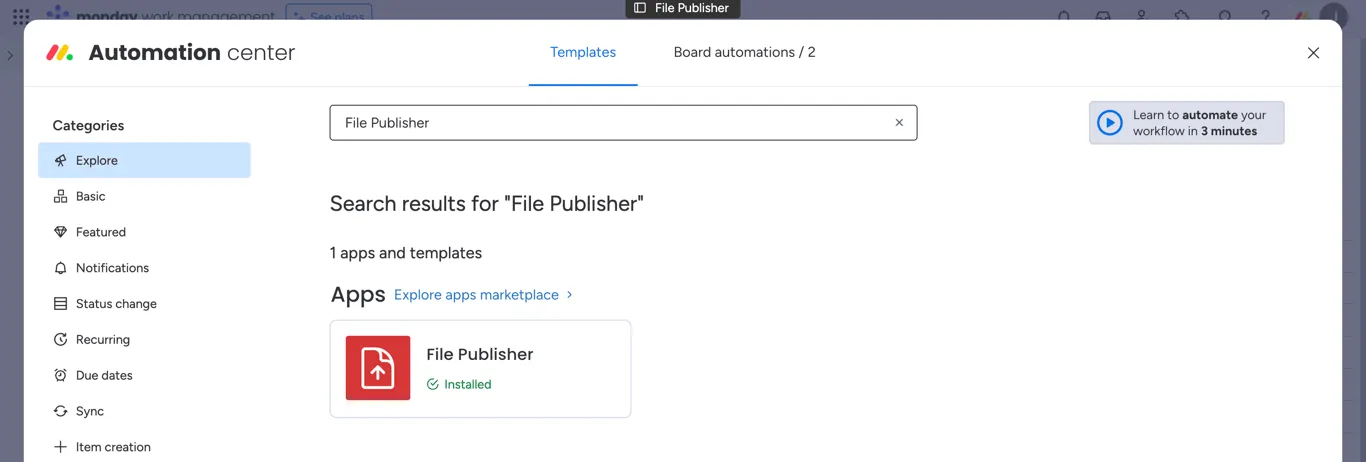
Click on File Publisher and select the template you’d like to use by clicking Use template
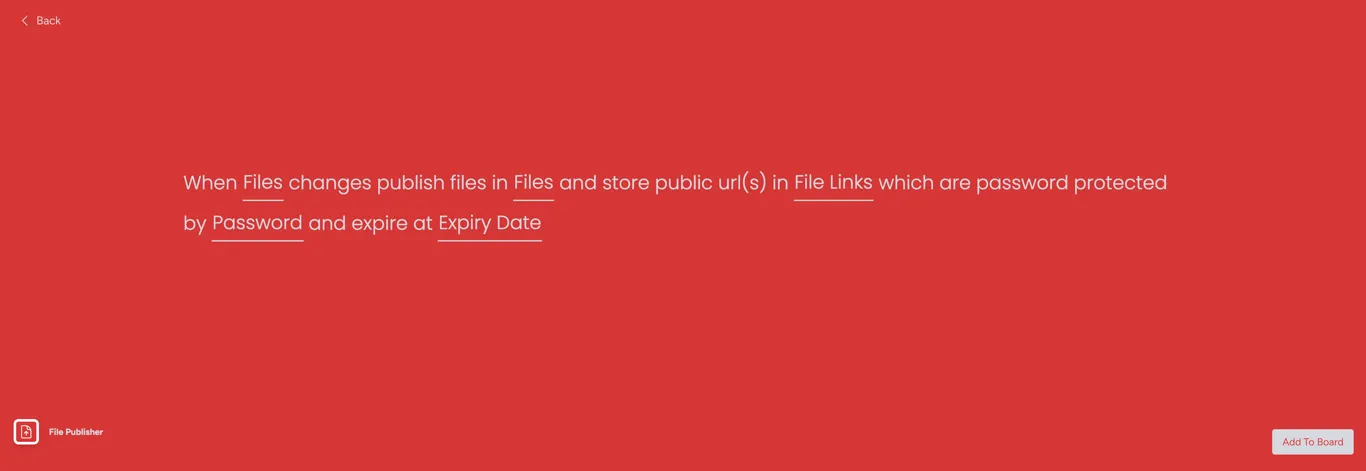
This will then direct you to the recipe builder.
On this page all the columns in grey need to be populated with the columns on your board. Both the first and second fields should be the same files column where you’ll be uploading assets to. This will allow the automation to trigger whenever an asset is added or removed from the column.
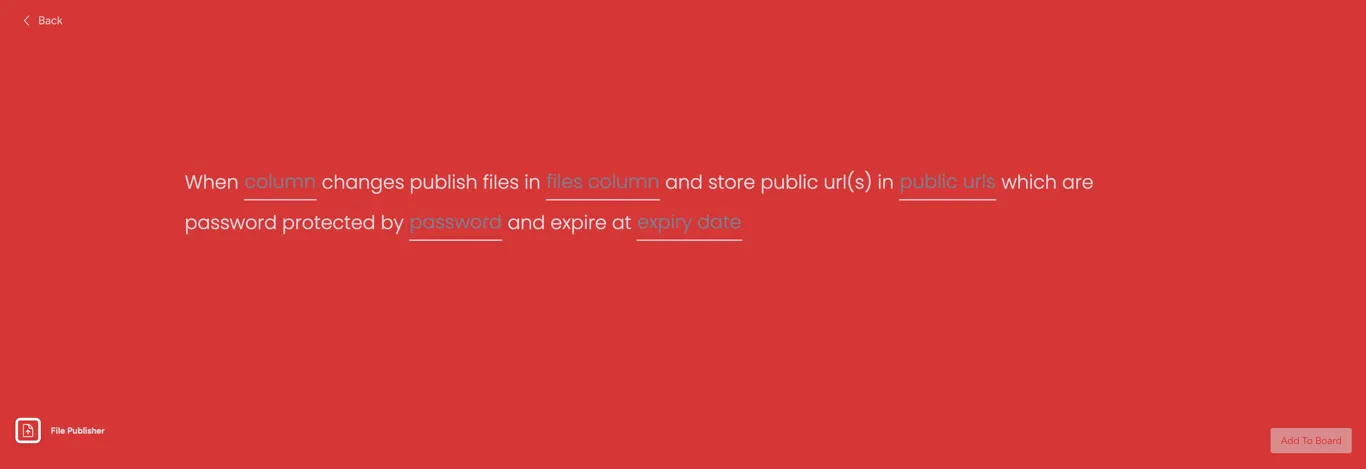
When all the fields are filled out, click Add to Board in the bottom right of your screen.

Creating your own custom automation
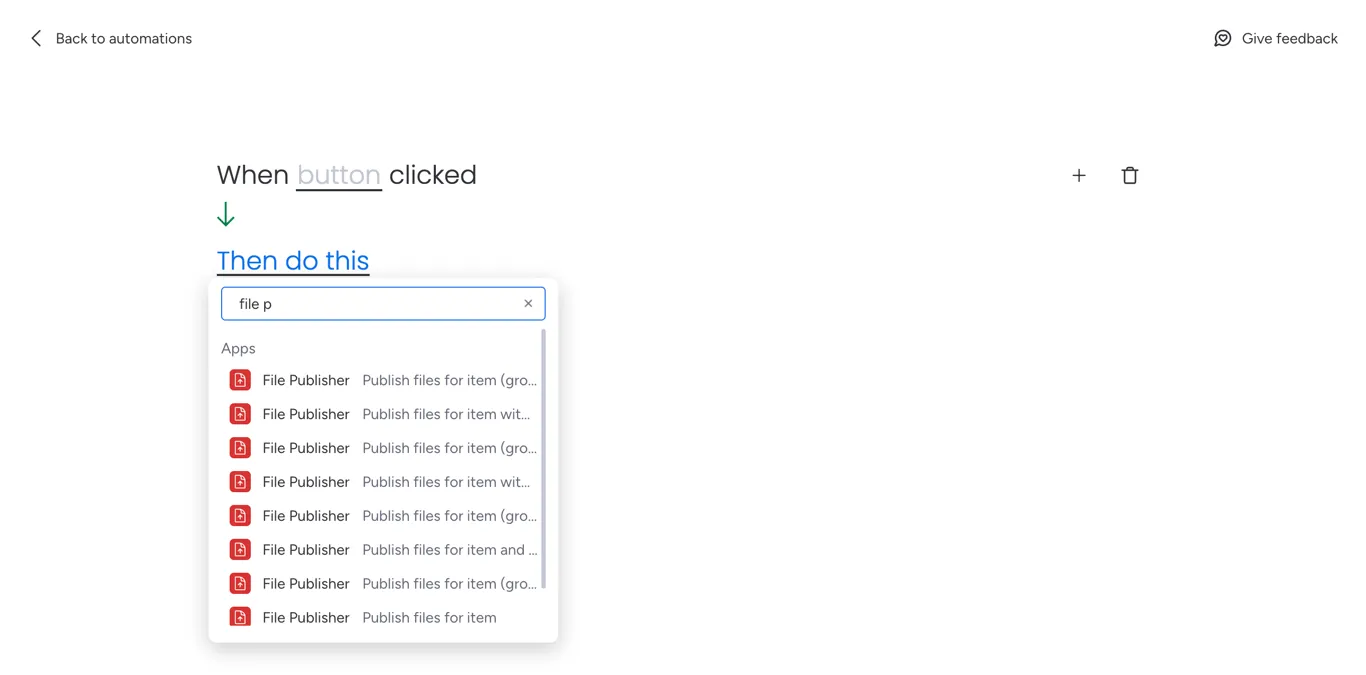
Section titled “Creating your own custom automation”Custom automations can also be used if the trigger of the templates doesn’t work for your use case. For example, if you would prefer to manually press a button or only generate the links when a status changes, you can achieve this by using a custom automation.
To do this, navigate to the Automations page like before, and select Board automations in the top tab instead of Templates.
From here, click Add new automation. This will then allow you to create a custom trigger (for example on button click). Then search for File Publisher in the actions section to see the available File Publisher actions.
Using workdocs
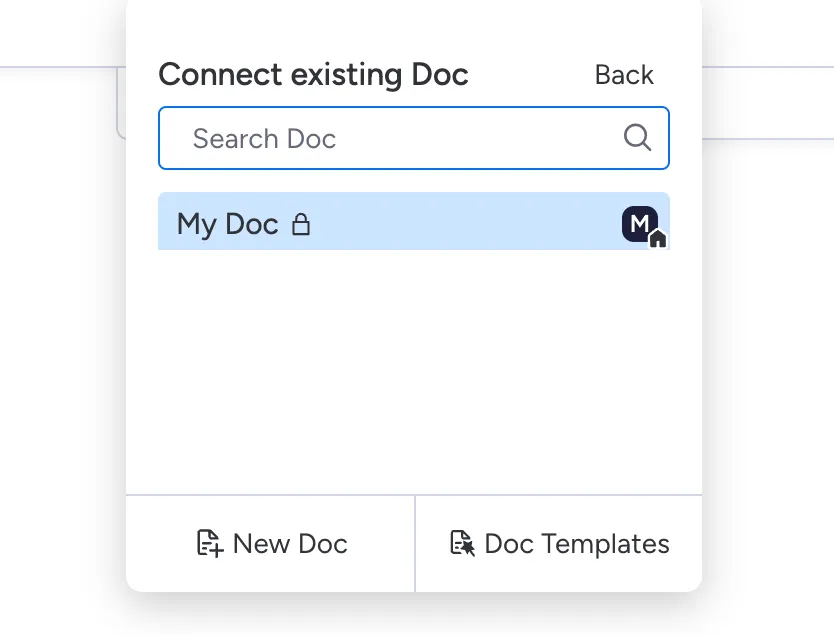
Section titled “Using workdocs”In addition to uploaded files, monday workdocs can also be added to the files column and published through File Publisher!
To add a workdoc, click inside the files column and select Doc.

You then have 3 options:
- New Doc: This will create a new doc for this cell
- Doc Templates: Browse your account doc templates and create a new doc for this cell
- Connect existing Doc: This will let you select an account wide doc to this cell
Supported preview file extensions
Section titled “Supported preview file extensions”Currently, File Publisher supports previews for the following file extensions. If a preview isn’t available for your file, you’ll be able to download the file instead.
Current supported file formats:
- Images: png, jpg, jpeg
- Videos: mov, mp4
- Audio: m4a, mp3
- Documents: pdf
Have a file format you’d like preview support for? Let us know!